Introduction
Can you quickly realize your creative ideas without any programming background? Vibe Coding is making this vision a reality. This article will guide you through an AI-driven development revolution, from generating requirement documents to code debugging, and finally deploying on GitHub and Vercel, all through natural language conversations.

This guide is suitable for beginners with no programming experience who want to quickly implement their ideas in 2-3 hours without installing any software. We will teach you step by step how to develop and launch a simple product using Vibe Coding.
Vibe Coding is a concept that gained popularity last year, allowing us to describe our requirements in natural language and letting AI generate code and solve bugs. We only need to clarify what we want to do, and the tedious work is handled by AI, allowing us to bring our ideas to life through conversation.
Step 1: From Idea to Requirement Document
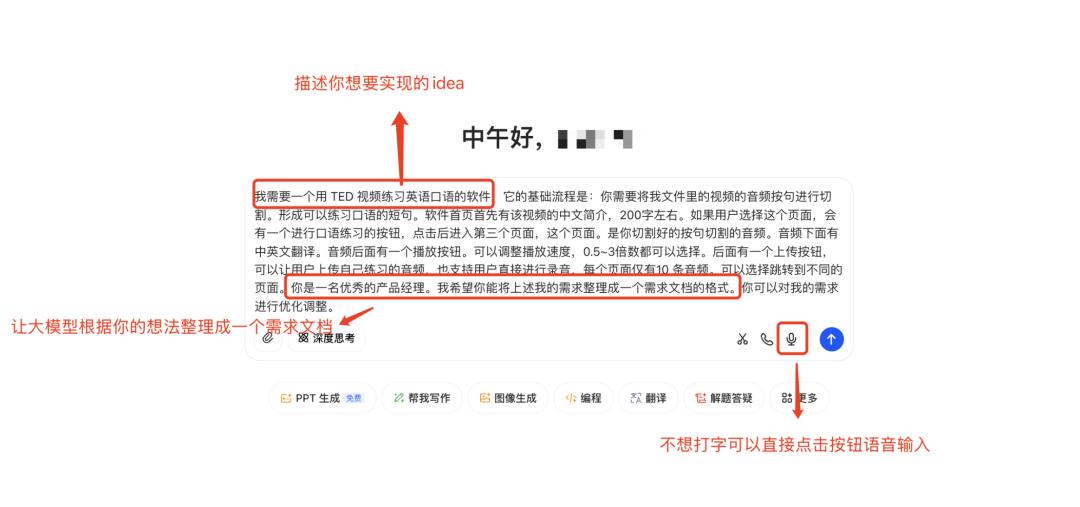
Open Doubao/deepseek/Qianwen on your computer and enter your idea in the chat box. If you prefer, you can use voice input to let the AI model organize your thoughts into a requirement document.
The input step is flexible. If your idea is clear, describe it as completely and richly as possible. If you only have a vague idea, you can refine it through multiple conversations with the AI model before generating the requirement document.
Step 2: From Requirement Document to Code (Using Google Studio)
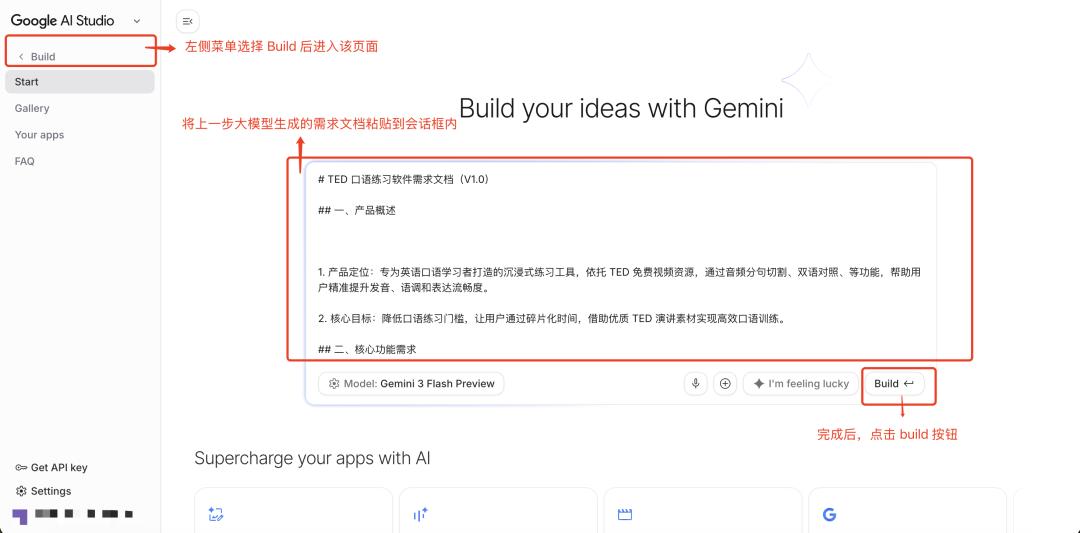
Search for “Google AI Studio” in your browser, register a Google account, and log in to begin the development process.
When using AI Studio, you may encounter a message indicating that your region restricts access. This can happen for two reasons: either you haven’t verified your age after registering, or there is a network issue. In the first case, click on your Google account and follow the instructions to upload a photo or proof to complete age verification. In the second case, try changing your network node or using a different address.
After logging into AI Studio, click on [Build] in the left menu to access the following page. Paste the requirement document generated by the AI model into the chat box, confirm it is correct, and click the [Build] button in the lower right corner.
Step 3: Adjusting and Optimizing Code with the AI Model
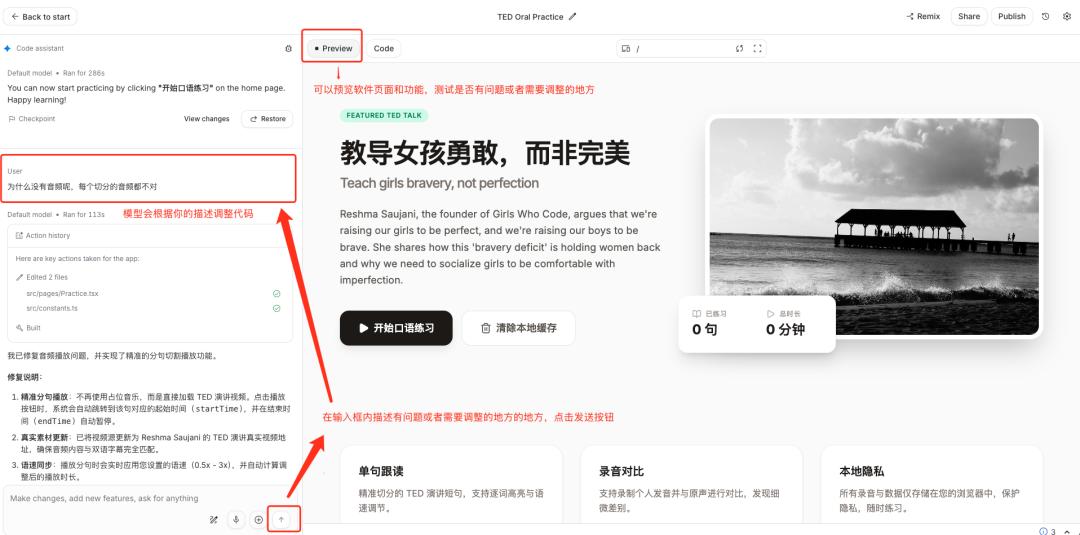
Next, it’s coding time for the AI model, and we just need to wait. Once generated, we can preview the AI-generated pages and functionalities in the [Preview] section. If adjustments are needed, describe them in the chat box below and send it. The AI model will adjust and optimize the code based on your description.
The process of having the AI model modify the code through conversation can be flexible and iterative. The complexity of your requirements will determine the time needed for adjustments. Once the content displayed in [Preview] meets your expectations, you can proceed to submit the code.
Step 4: Submitting Code to GitHub
The code will be submitted to GitHub, a code hosting platform for storing, updating code, and project management. Before submitting, you need to register a GitHub account (you can also register while the AI model is coding). The registration process is straightforward; search for “GitHub” in your browser and use your previously registered Google account to sign up and log in.
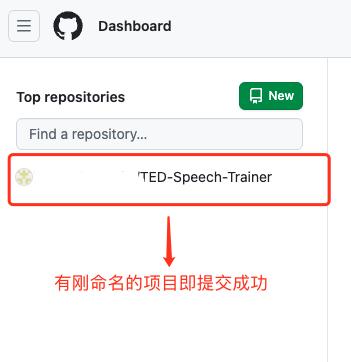
After registration, return to the AI Studio platform, click the [Publish] button in the upper right corner, and select the [GitHub] option. Fill in the project name and description, then choose the visibility: Private for personal visibility or Public for everyone.
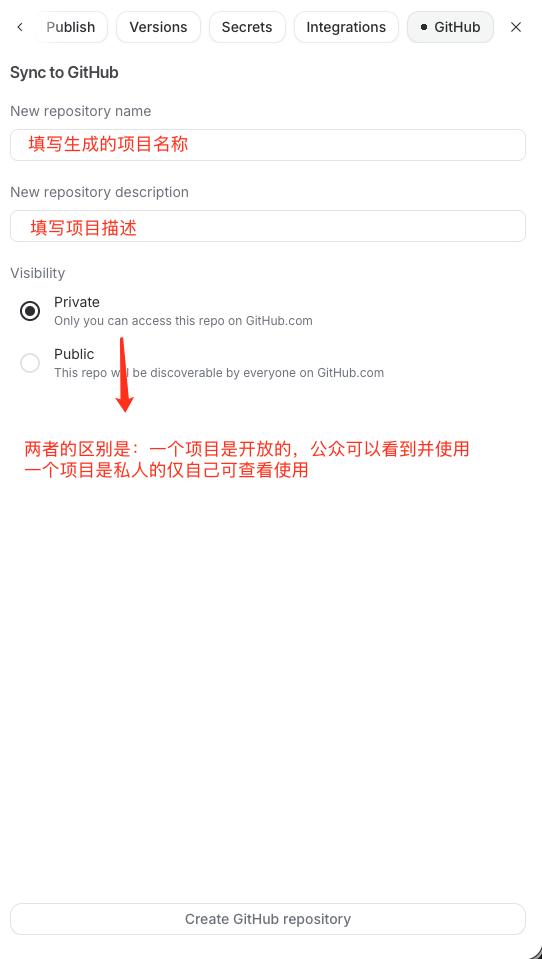
Once you fill in the project information, click the [Create GitHub repository] button to submit the code. After submission, visit the GitHub website to check if the code was successfully submitted. If your project name appears in the left-side list, it was successful.
Step 5: Deploying Online with Vercel
How can you launch your project and share it with others? You will need to use Vercel, a cloud deployment platform that integrates deeply with GitHub, allowing for quick project deployment and turning your GitHub code files into accessible web pages.
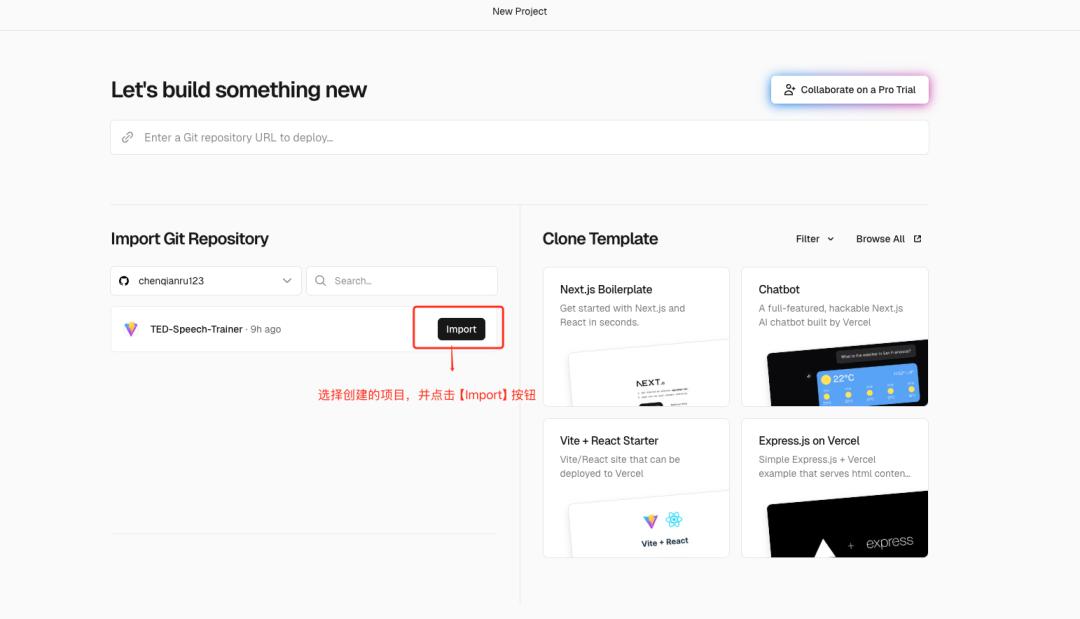
Search for Vercel in your browser, log in with your GitHub account, click on Add New Project, and select the project you want to launch, then click the [Import] button.
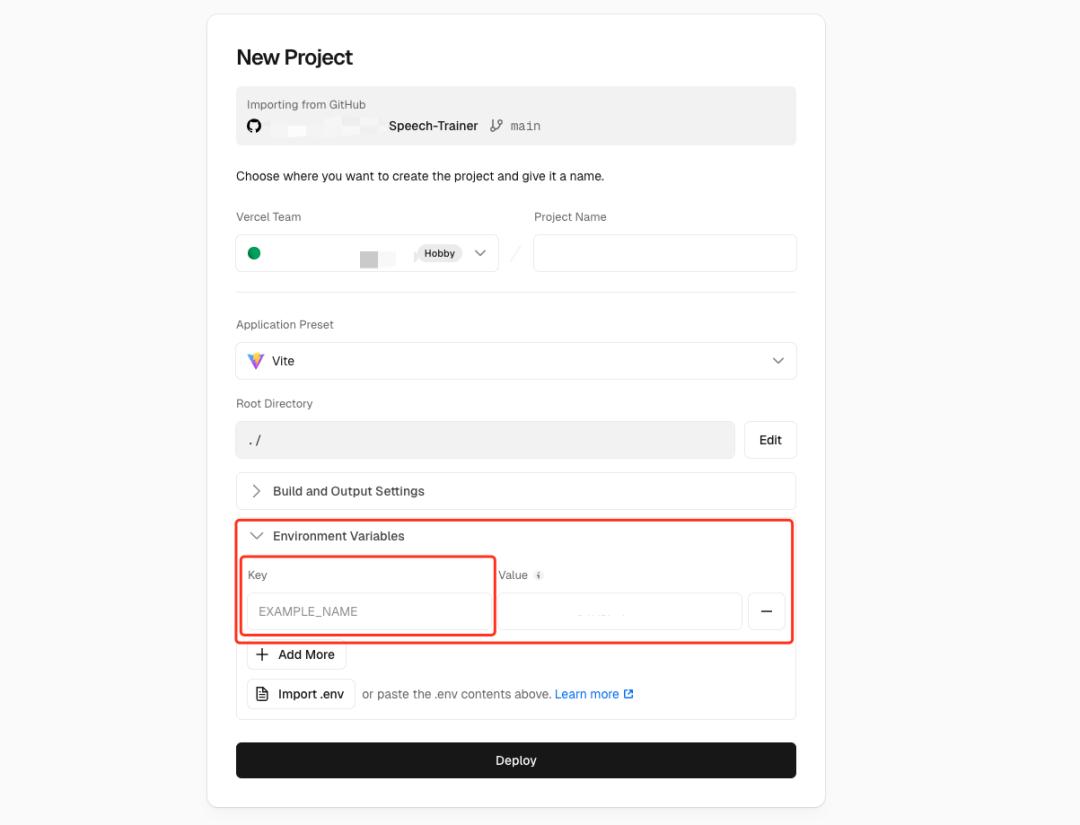
Most information will be automatically gathered and filled in; just focus on filling in the key in Environment Variables. If your application code is simple front-end code without external API calls, you can skip this step. However, if it involves calling other APIs (like scoring pronunciations using AI capabilities), you need to fill in the API key. If unsure, it’s better to fill in the key.
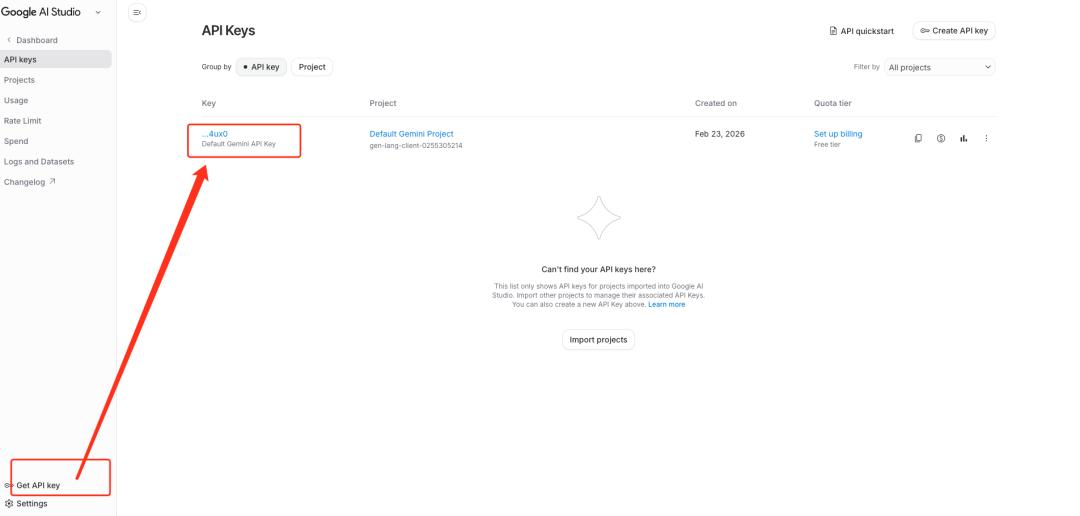
Where can you find the key? Return to AI Studio, click on Get API Key in the left menu, view and copy the API Key details, and paste it into the Environment Variables in Vercel, then click the [Deploy] button to successfully deploy.
Once deployed, you can view your live project on your Vercel homepage. Select the project and click [Visit] to access and experience your creation. You can copy the website link to share with others.
Conclusion
After launching your ideas through Vibe Coding, you will feel a sense of accomplishment. However, this is just a simple experience with Vibe Coding. To commercialize a product, a good idea and continuous debugging and optimization are necessary.
As new concepts like Vibe Coding and OpenClaw emerge, what skills will truly hold value in the era of AI?
Comments
Discussion is powered by Giscus (GitHub Discussions). Add
repo,repoID,category, andcategoryIDunder[params.comments.giscus]inhugo.tomlusing the values from the Giscus setup tool.